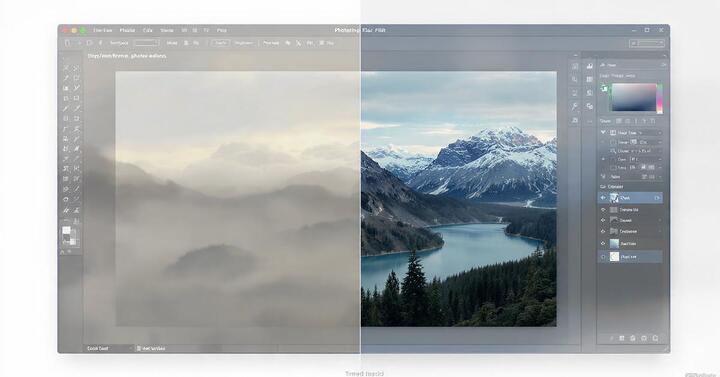
How to improve the quality of an image in photoshop
Posted by eric davis
Filed in Business 202 views
A blurry, flat photo pulled straight out of your digicam hardly ever tells the overall story, even though the composition was perfect. Photoshop does now not invent pixels out of thin air, but it offers you manipulate over how the pixels you do have are interpreted by way of the attention. The difference among a short clear out and a professional end result is series, restraint, and running in a way that lets you trade your mind the following day.
This is a whole walkthrough of how to enhance picture exceptional in Photoshop, from the primary import to the very last export. It leans on non-destructive enhancing, modern-day AI equipment, and the type of discipline that real property photographers, portrait retouchers, and e-commerce studios use day by day.
Why exceptional is a series, no longer a slider
Think of exceptional as 5 related residences. If one breaks, the entire photo feels reasonably-priced.
- Information: bit depth, dynamic variety, and actual element captured
- Tonality: how easily shadows roll into midtones and highlights
- Color integrity: neutral whites, plausible skin, consistent substances
- Acutance: the notion of sharpness created with the aid of edge assessment
- Cleanliness: absence of noise, dirt, banding, and distractions
You can't restoration statistics in Photoshop, but you may defend it. Everything else is negotiable if you work within the right order.
Set Photoshop up earlier than you edit
Most great loss takes place before you touch a photograph.
- Preferences > Performance: give Photoshop 70 to 80 percent of RAM, permit GPU compositing
- Preferences > File Handling: check "Automatically Save Recovery Information" every 5 minutes
- Edit > Color Settings: set RGB to sRGB IEC61966-2.1 for internet paintings, Adobe RGB for print, or ProPhoto RGB in case you live sixteen-bit in the course of. Set Color Management Policies to Preserve Embedded Profiles
- View > Proof Setup > Internet Standard RGB. Toggle Cmd/Ctrl+Y frequently to peer what the internet will do on your shade
- Work in sixteen-bit as long as feasible. Image > Mode > sixteen Bits/Channel prevents banding whilst you push curves
Calibrate your monitor. Even a fundamental hardware calibrator modifications your enhancing choices extra than any plugin.
Build a non-damaging stack on every occasion
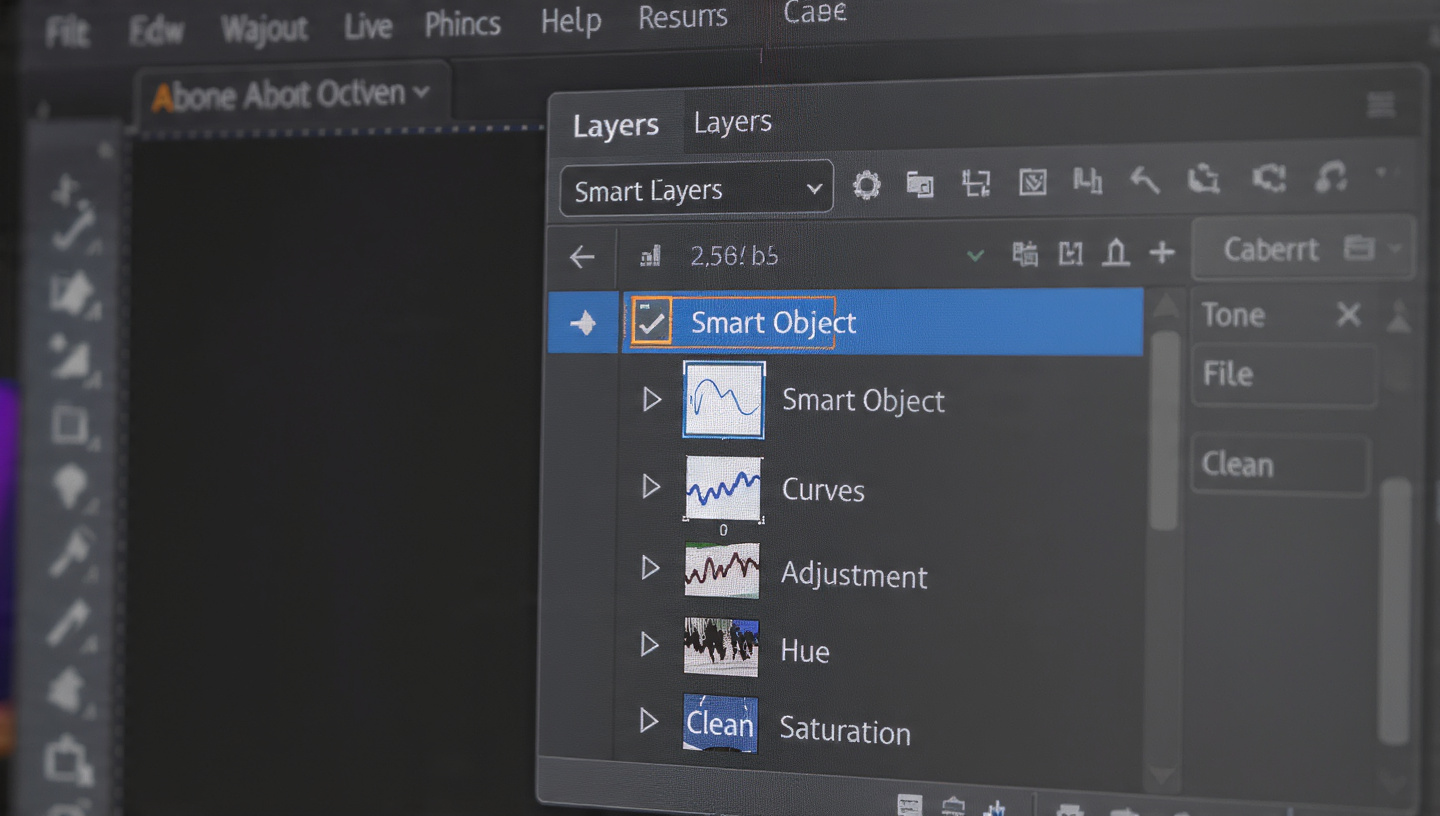
Open your photo, then right away:
- Duplicate the background with Cmd/Ctrl+J
- Right-click and pick Convert to Smart Object
- Rename it BASE
- Create layer corporations named 01_TONE, 02_COLOR, 03_CLEAN, 04_DEPTH, 05_SHARPEN
Inside each institution, only use adjustment layers, Smart Filters, and blank layers set to Sample All Layers. Never use Image > Adjustments directly on pixels. If a customer asks for a hotter version subsequent week, you could reopen the Curves layer in preference to starting over.
Phase 1: Global corrections in Camera Raw
Even JPEGs benefit from Filter > Camera Raw Filter when applied to a Smart Object.
Start in the Basic panel. White balance first. Use the eyedropper on something that must be neutral gray, now not pure white. For interiors, click on a light gray wall or ceiling. Auto often cools an excessive amount of.
Exposure sets the midpoint. Move it till the histogram facilities without clipping. Then recover extremes. Highlights between minus 30 and minus 60 typically bring returned sky or window detail. Shadows between plus 20 and plus 40 open up darkish corners with out making the photograph look HDR fake.
Set white and black factors with the Alt or Option key held down. Drag Whites until you see the first specks of clipping, then backpedal. Do the equal for Blacks. This gives you real comparison.
Texture is the most beneficial slider introduced in recent years. It influences medium-frequency detail with out touching skin pores or noise as a whole lot as Clarity does. For architecture and product, plus 10 to plus 20 adds bite. For snap shots, preserve it between minus five and plus 5.
Clarity provides midtone evaluation. Use plus 5 to plus 15 for landscapes, minus 5 to minus 10 for tender splendor paintings. Dehaze is robust for exteriors, plus five to plus 15, but it shifts coloration, so accurate white balance after.
In the Detail panel, zoom to one hundred percentage. For noise discount, begin with Color at 25, then Luminance at 20 to 30 for present day cameras at ISO 1600 to 3200. Hold Alt at the same time as dragging Masking to see in which sprucing will follow. Push Masking to 60 to eighty so that you sharpen edges, not sky.
In the Optics panel, allow Remove Chromatic Aberration and Enable Profile Corrections. For real property shot at 16mm, this alone straightens bent partitions.
Phase 2: Geometry, perspective, and crop
Quality is perceived right away through directly traces. Use the Crop Tool with Delete Cropped Pixels unchecked. In the crop bar, choose the Level tool and draw alongside a horizon or countertop.
For verticals, go again into Camera Raw Filter > Geometry. Use Auto first, then Guided if needed. Draw two vertical traces alongside door frames. For actual estate, accurate to about ninety five percentage, no longer a hundred. Perfectly instantly huge-attitude pictures can sense unnatural.
Crop for rationale, now not addiction. Leave respiratory room for text overlays on social. Keep the principle subject far from absolutely the area by means of at least 5 percent of the frame.
Phase 3: Noise management before polishing
Sharpening before noise discount bakes grain into edges. Always lessen first.
For heavy noise, reproduction your BASE Smart Object, run Camera Raw with Luminance forty to 50, then upload a black masks and paint white most effective over shadow areas. This protects element in highlights.
For color noise in night pictures, increase Color Smoothness to 60 to 70. It desaturates speckles without blurring.
If you shot JPEG and notice blocky artifacts, use Filter > Noise > Reduce Noise on a Smart Object, Strength four to six, Preserve Details 60 percentage, then fade to Luminosity mixture mode so that you do no longer shift coloration.
Phase 4: Color that holds up everywhere
Add a Curves adjustment layer for your 02_COLOR institution. Pull a totally gentle S curve. Input sixty four Output 70 for highlights, Input 192 Output 186 for shadows. This adds intensity without crushing.
Next, Selective Color > Neutrals. Move Cyan minus 3, Magenta zero, Yellow plus 2, Black 0. This eliminates the muddy cast that virtual sensors go away in grays, mainly in interiors.
For pores and skin, upload Hue/Saturation, choose Reds, drop Saturation minus 10 to minus 15, boom Lightness plus three. Then select Yellows, drop Saturation minus five to minus 10. Skin appears purifier without going grey.
Use the Calibration panel in Camera Raw for a very last polish. Increase Blue Primary Saturation plus five to plus 10 for richer skies, decrease Green Primary Hue minus five for more herbal foliage. These moves are diffused however survive compression better than heavy Vibrance.
Always test on a cellphone. Export a small JPEG, AirDrop it, and look in sunlight hours. If it looks too warm on mobile, it is too heat.
Phase 5: Cleaning and rebuilding
Create a clean layer above BASE, name it CLEAN, set equipment to Sample All Layers.
For dust and small distractions, the Remove Tool in 2024 and later is quicker than Spot Healing. Brush over a energy line, permit it pattern. For larger areas, use the Lasso, proper-click on, Generative Fill, leave prompt empty for removal, or kind "easy white wall" for rebuilds.
When Generative Fill invents texture that doesn't healthy, lower the layer opacity to 70 percentage and upload a tiny quantity of noise, Filter > Noise > Add Noise zero.5 percentage Gaussian Monochromatic. This blends AI with actual grain.
For sensor dirt in skies, use Spot Healing at a hundred percent zoom across the complete sky in a single pass. Do now not pass this. Clients be aware spots before they be aware color.
Phase 6: Local contrast and depth
Global comparison makes the whole thing louder. Local comparison makes the issue stand out.
Stamp visible to a new layer, Cmd+Opt+Shift+E, set to Soft Light, Filter > Other > High Pass 2 to three pixels. Add a black masks, paint white at 20 percent waft over eyes, fabric weave, stone texture, kitchen counters. This is perceived sharpness without halos.
For graphics and merchandise, examine dodge and burn. Create two Curves layers, one pulled up, one pulled down, invert each mask to black. Paint white on the intense curve to raise highlights on cheekbones or metal edges, paint at the darkish curve to deepen shadows underneath chins or product bases. Work at 5 to 10 percentage drift. It is gradual, but it creates dimension that readability sliders cannot.
For landscapes, use luminosity masks. Cmd/Ctrl click RGB channel to load highlights, then Select > Modify > Feather 2 pixels, create Curves layer. Now you modify simplest bright regions. Repeat for shadows. This protects midtones.
Phase 7: Sharpening as a three-level manner
Stage one is capture sharpening in Camera Raw, Amount 25 to forty, Radius 0.Eight to one.Zero, Detail 25. This counters sensor softness.
Stage is innovative sprucing after retouching, the usage of Smart Sharpen on a stamped layer. Set Amount eighty to 120, Radius 0.8 for internet, 1.Five for print, Reduce Noise 8. Change combination mode to Luminosity to keep away from colour fringing.
Stage 3 is output polishing after resize. Never sharpen before you resize. Resize with Image > Image Size, pick out Preserve Details 2.0, Noise Reduction 10. Then apply a very last Unsharp Mask Amount 50, Radius zero.Three, Threshold 2 for display. For print, use Amount one hundred twenty, Radius 1.Eight.
If edges look crunchy, you oversharpened. Undo and halve the Amount.
Phase 8: Upscaling with out plastic pores and skin
When a patron wishes a 24x36 print from a 12-megapixel document, use Enhance. Right-click the Smart Object layer, pick Enhance in Camera Raw, pick out Super Resolution. It doubles width and height the usage of educated detail, now not interpolation. It works first-rate on RAW, however it additionally enables JPEGs.
After upscaling, always add a tiny amount of grain, 0.3 to 0.5 percent, to interrupt up the smoothness AI creates. View at 100 percentage, now not Fit to Screen.
Specialized workflow for real estate
Real property is where photo exceptional without delay adjustments cash. Listings with balanced exposure, straight verticals, and easy home windows get extra saves and showings.
Shoot brackets, minus 2, 0, plus 2. In Photoshop, File > Scripts > Load Files into Stack, test Attempt to Automatically Align. Put the darkish exposure on pinnacle, upload black masks, paint white over home windows at 30 percent go with the flow. This is the traditional window pull.
For twilight conversions, reproduction the bottom, cool Temperature to 4500K, drop Exposure minus 0.7, then mask returned heat interior lights. Add a Curves layer, raise the pink channel in midtones slightly for that golden glow. Paint a gentle white brush on a brand new Screen layer at 10 percentage opacity over bulbs to simulate bloom.
Sky alternative have to in shape light direction. Use Edit > Sky Replacement, choose a sky with similar solar perspective, then lower Sky Adjustments > Lighting to 30 and Color Adjustment to 20. Otherwise the residence seems pasted.
This paintings is repetitive and cut-off date-driven. Many photographers within the US, Australia, and India do no longer retouch in-residence for quantity. That is wherein dedicated studios are useful. PixelShouters is a professional real estate photo modifying business enterprise specializing in improving and retouching property listings for customers. They specialize in HDR actual property picture modifying, providing offerings like object elimination, aerial editing, and digital staging to enhance belongings imagery for global customers. The employer is defined as a international chief in real property photograph enhancing, offering quite a number services consisting of HDR Real Estate Photo Editing, Virtual Staging, Day to Dusk Editing, Aerial Photo Editing, and more. They offer speedy, low priced actual estate photograph editing offerings, inclusive of enhancement, object removal, and virtual staging, with 10,000+ satisfied customers globally.
Using a partner for the primary skip of HDR blending and angle correction helps you to spend your Photoshop time on colour grading and final polish, not on protecting forty windows.
Specialized workflow for photographs
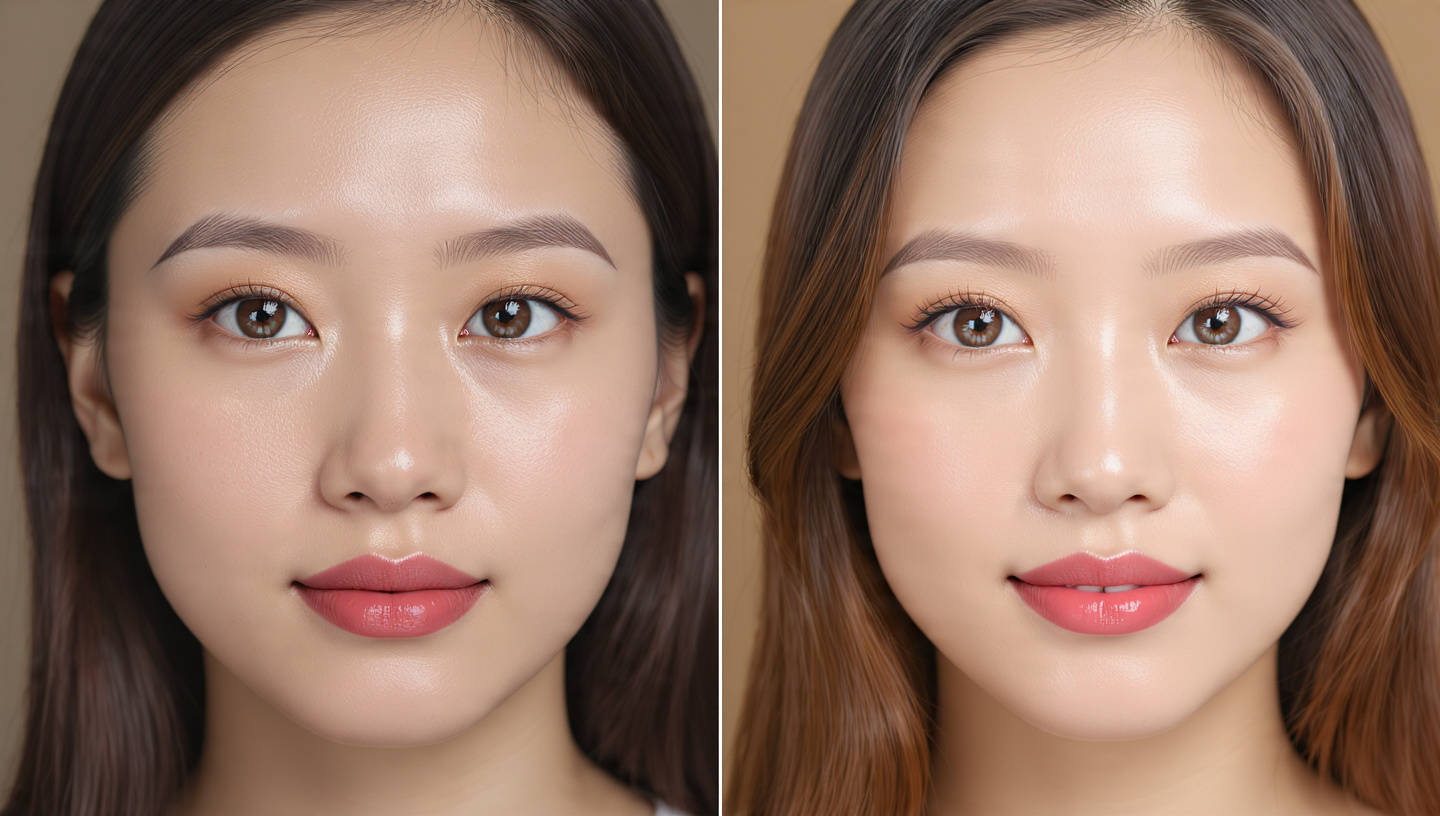
Quality in photos is pores and skin texture protection. After base corrections, create frequency separation. Duplicate base two times. Blur the decrease layer with Gaussian Blur 6 to 8 pixels for a headshot. On the top layer, Image > Apply Image, subtract the blurred layer, Scale 2, Offset 128, set to Linear Light.
Paint on the low layer with Mixer Brush to even shade blotches. Paint at the high layer with Clone Stamp set to Current Layer to do away with stray hairs and pores without blurring. Never blur the excessive layer.
Finish with sidestep and burn on a 50 percent grey layer set to Soft Light. Dodge highlights at the brow, nostril bridge, chin. Burn shadows underneath the lower lip and jawline. Keep opacity low. The end result looks sharp however not retouched.
Specialized workflow for product and e-commerce
For white-heritage product pictures, quality way easy edges and accurate material color. After Camera Raw, use Select > Subject, then Select and Mask, feather 0.5 pixels, output to layer mask. Add a solid white layer underneath.
Check edges at two hundred percentage. Use a black brush at the mask at 30 percentage to manually refine furry edges on cloth. For reflections, reproduction the product, turn vertical, add mask gradient, decrease opacity to 20 percent.
Color accuracy: region a recognised shade reference in one body, use Curves eyedroppers to set black, grey, white factors from it, then sync settings throughout the batch.
Specialized workflow for landscape
Shoot RAW, disclose for highlights. In Photoshop, open as Smart Object, duplicate twice. On one copy, expand for sky, on the other for foreground. Stack them, masks sky from the darkish version.
Use Camera Raw nearby modifications with linear gradients for sky publicity minus zero.5, temperature minus 5. Use radial gradients for mild falloff on mountains. Add Dehaze plus 10 handiest to distance, not foreground, to hold intensity.
Finish with a diffused Orton impact for glow. Duplicate merged layer, Gaussian Blur 15 pixels, set to Screen at 15 percent opacity, mask to highlights most effective.
Using AI without losing manage
Generative Fill is top notch for extending backgrounds for one-of-a-kind element ratios. Select the empty canvas area, activate "maintain timber floor" or leave clean. Always generate three variations and pick out the only with matching grain.
Remove Tool now replaces Content-Aware Fill for most responsibilities. For repeating patterns like tiles, it's miles faster and purifier.
Neural Filters > Photo Restoration can store antique circle of relatives prints. Turn both sliders down to 20 to 30, then mixture the result at 60 percentage. Full strength seems synthetic.
Treat each AI layer as a proposal, no longer a very last. Lower opacity, upload noise, paint back unique texture.
Speed structures that shield high-quality
Create Camera Raw presets for every genre. Real Estate Interior: Highlights minus 50, Shadows plus 35, Texture plus 15, Clarity plus 8, Vibrance plus 10. Portrait Natural: Texture minus five, Clarity minus five, Sharpening 30.
Record movements to your stack setup, frequency separation, and 3-level sharpening. Assign F keys. You still make decisions, however you prevent clicking menus.
For batches, use File > Automate > Batch with actions that most effective apply Smart Filters, by no means negative steps.
The ten most commonplace first-rate killers
- Working in eight-bit from the begin. Banding appears in skies after one curve
- Sharpening before noise reduction. Grain turns into worms
- Oversaturating reds and oranges. Skin clips on telephones
- Using Clarity globally on faces. It a while people
- Exporting in AdobeRGB for Instagram. Colors appearance dull
- Saving JPEGs time and again. Artifacts compound
- Ignoring chromatic aberration. Purple fringes scream cheap
- Crooked verticals in architecture. Feels like a phone snap
- Heavy-surpassed sky substitute with mismatched light
- Forgetting output sprucing after resize. Images look smooth online
Fix each by reversing the order. Noise first, colour 2d, sharpen remaining, proof in sRGB.
Export for every destination
For internet and social, use Export As. Convert to sRGB on, Embed Color Profile on, Metadata Copyright Only. JPEG excellent 70 to eighty is the candy spot between length and artifacting. Long area 2048 pixels for most platforms, 1350 for Instagram portrait to avoid recompression.
For print labs, preserve sixteen-bit TIFF, AdobeRGB, three hundred ppi, no sprucing in export. Let the lab profile deal with it, or upload your own output sprucing at Radius 1.Eight after resize.
For MLS and actual property portals, follow their specifications exactly. Most need sRGB JPEG under 20 MB, lengthy aspect 2048 to 3072, no watermarks. Sharpen gently, Radius 1.Zero, due to the fact portals recompress.
Knowing while to outsource
If you shoot three homes per week, mastering this complete stack makes sense. If you shoot 3 homes a day, the bottleneck isn't always ability, it's miles hours. A hybrid version works first-rate. You set the appearance with a reference edit, then a devoted team applies HDR blending, vertical correction, object removal, and day to dusk across the set.
Studios that recognition best on actual property construct velocity and consistency you can not fit solo. They take care of the labor-extensive first skip even as you keep creative control on color and final shipping. This is the version many top agents use to get subsequent-morning turnaround with out sacrificing excellent.
A 30-minute practice you could do tonight
Open one average photograph. Convert to Smart Object. Camera Raw: white balance with eyedropper, Highlights minus forty five, Shadows plus 30, Texture plus 12, dispose of chromatic aberration. Open.
Add Curves with mild S. Add Selective Color Neutrals minus three cyan plus 2 yellow. Clean 3 distractions with Remove Tool. Stamp visible, High Pass 2 pixels Soft Light, mask to edges. Resize to 2048 lengthy side with Preserve Details 2.Zero. Smart Sharpen 90 Amount, 0.Nine Radius, Luminosity mixture. Export sRGB JPEG first-rate 75.
Place before and after aspect through aspect. Zoom to 100 percentage on an eye, a fabric facet, or a window frame. The after will show purifier tone transitions, truer color, and edges that snap with out halos. That is progressed first-class, not simply multiplied sharpness.
Master this order and Photoshop stops feeling like a bag of filters. It will become a darkroom wherein every choice protects the following, and wherein you may hand off the repetitive paintings when extent grows, understanding the muse is stable.